Note that older versions of cPanel used the term, “Parked Domains” rather than “Aliases.” Functionally they are the same thing. Only the name has changed.
The Alias function in cPanel allows you to host additional domains on your GreenGeeks account and each Alias domain will serve the content from your primary domain name. When a user enters the address for an Alias domain, it redirects to the primary domain on which it is parked.
For example, if ggexample.net is an Alias for ggexample.com, ggexample.com will be accessed when ggexample.net is entered into the web browser (to learn more about Alias and Addon domains, please see our Knowledge Base article, Addon VS Parked (Alias) Domains).
Method 1: GreenGeeks Dashboard
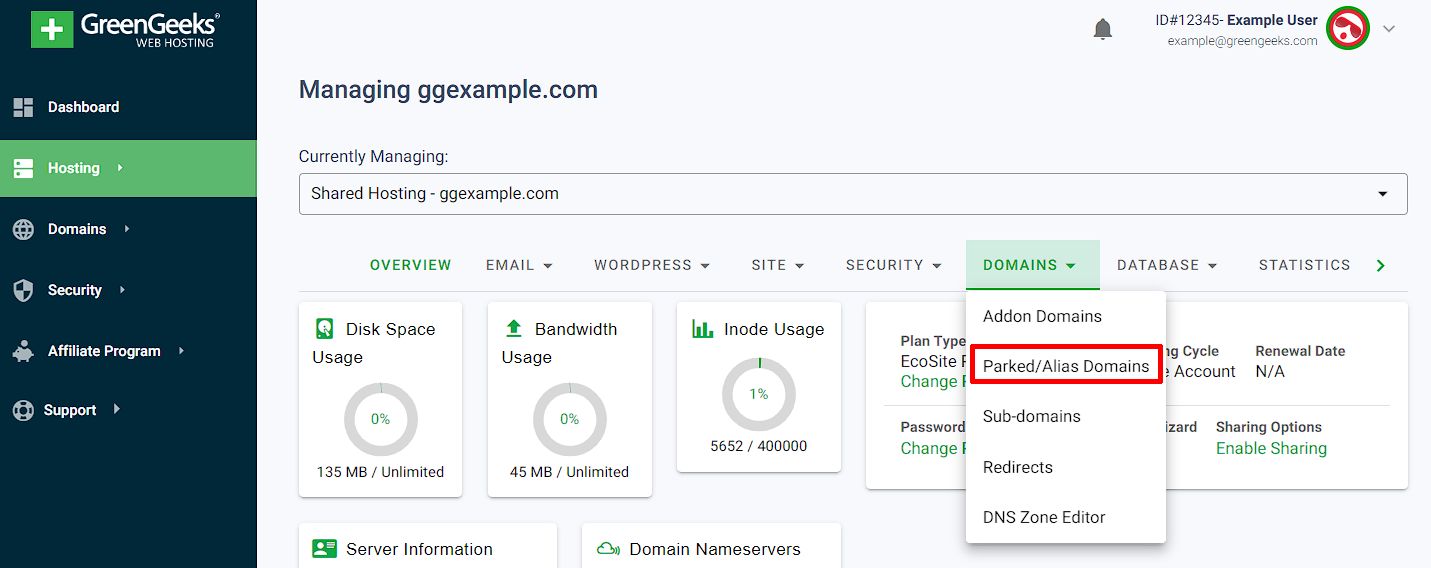
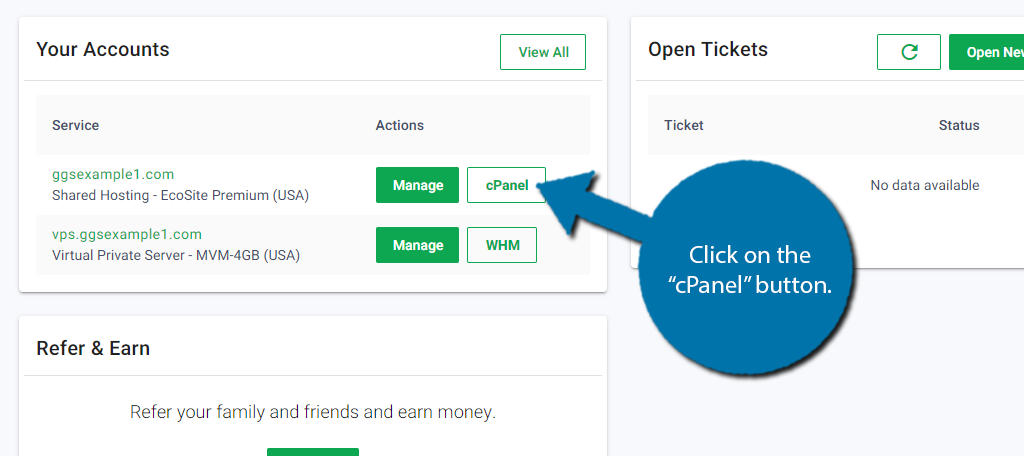
1. To add an Alias using the GreenGeeks Dashboard, click on the Manage button next to your hosting service, on the Dashboard Homepage, or the Hosting page.
2. On the hosting management page, select the Domains drop-down menu & click the Parked/Alias Domains button
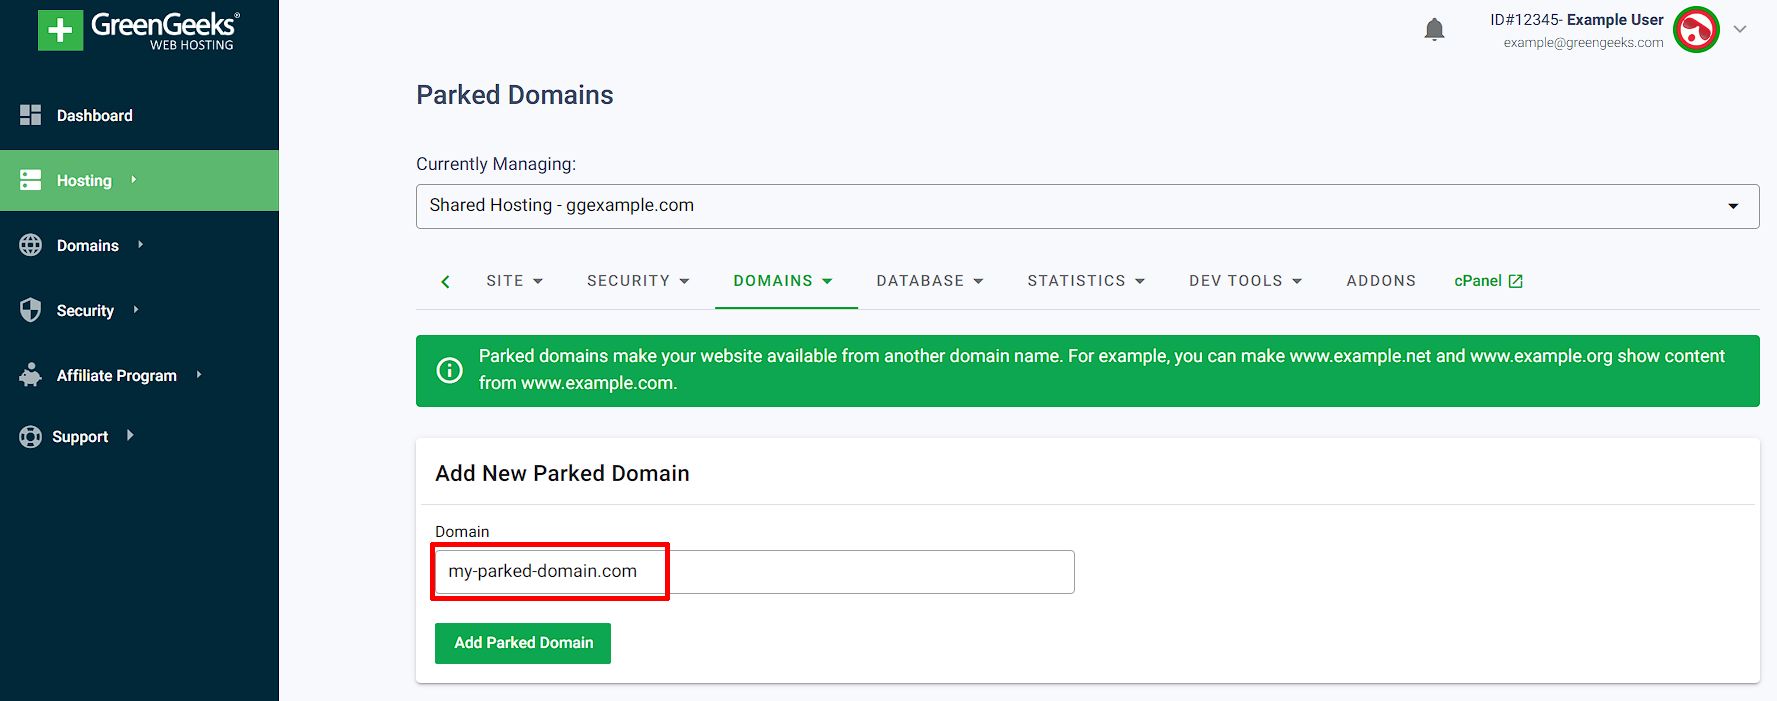
3. On the Parked Domains page in the Dashboard, enter the new Alias/Parked Domain in the Domain field and click Add Parked Domain.
It may take 90-120 seconds for the new Parked Domain to be added.
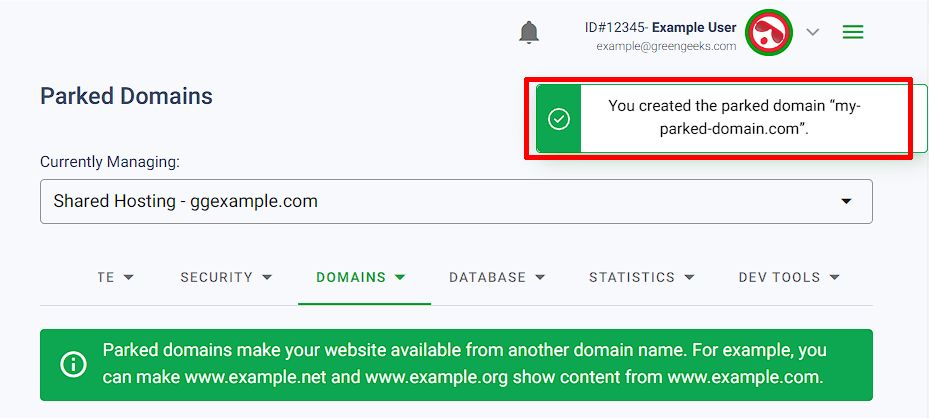
4. Once the domain has been added, a confirmation notification will be shown.
5. After the parked domain is configured on the GreenGeeks hosting account, it’s time to point the nameservers for that domain to GreenGeeks to finish connecting the domain to the GreenGeeks hosting account.
Method 2: cPanel
To add an Alias domain, log in to GreenGeeks and go to cPanel by clicking the “cPanel Login” button in the “Quick Server Login” section.
1. Click the “Domains” icon in the “DOMAINS” section.
2. Click on the Create a New Domain button.
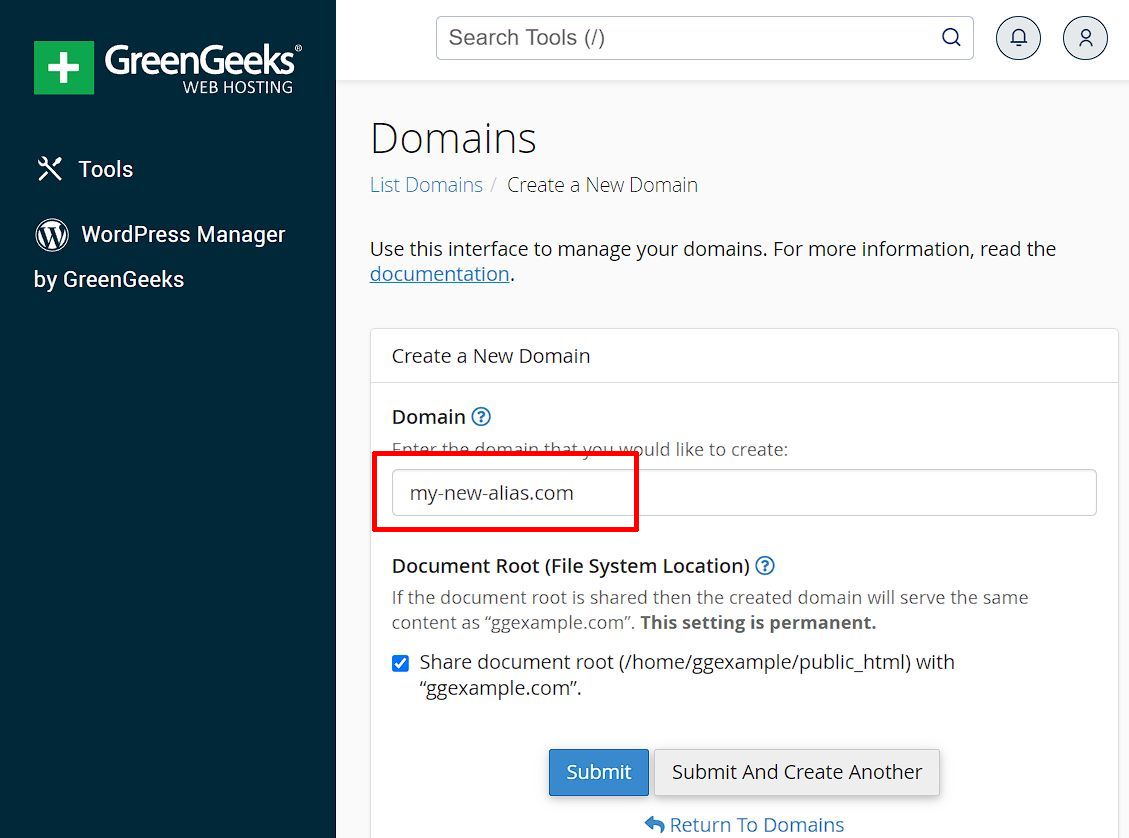
3. On the Create a New Domain page, enter the domain you wish to use as an Alias in the Domain text field.
4. Click the “Submit” button and allow 60-120 seconds for the Alias to be added.
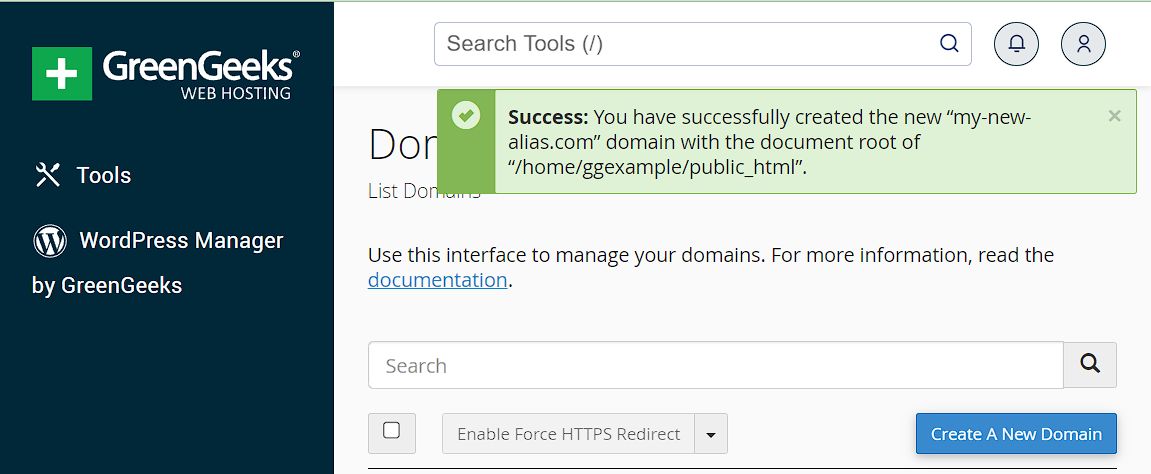
5. Upon completion, you will be re-directed back to the Domain management page, and a notification will appear indicating the Alias was successfully added.
Once the Alias domain has been added to the server, it can be used as a redirect to another domain hosted on your GreenGeeks account or elsewhere.
6. After the parked domain is configured on the GreenGeeks hosting account, it’s time to point the nameservers for that domain to GreenGeeks to finish connecting the domain to the GreenGeeks hosting account.
Alias Domain Email Accounts
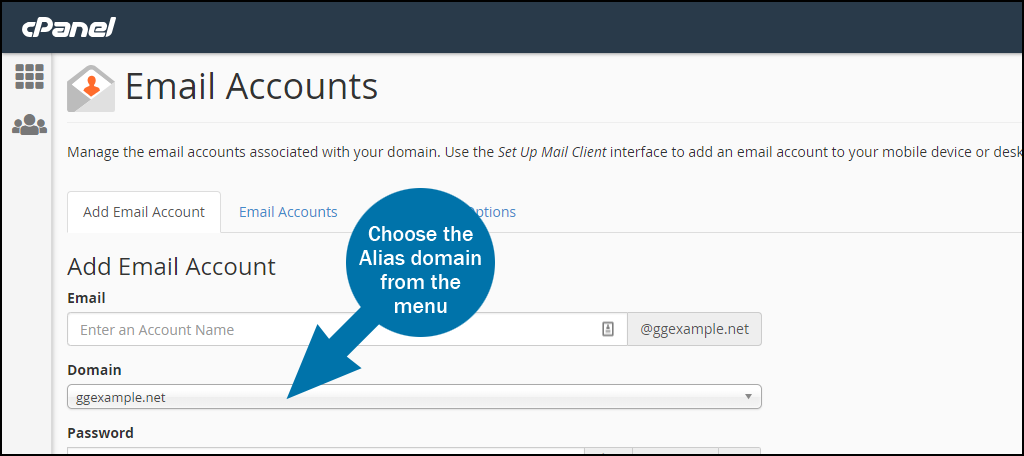
Email accounts for Alias domains can also be set up in the “EMAIL” section of cPanel.
Click the “Email Accounts” link/icon and you will be able to choose the Alias domain from the “Domain” drop-down menu.
Troubleshooting
If you receive an error while adding an Alias in the GreenGeeks Dashboard, or cPanel, open a new Support Ticket Request from your GreenGeeks Dashboard.


